In the extremely extensive category of 'daft things I've done' there is, in the same building, an expensive Summer toy and an entertainment system to help with making hours on the Winter turbo trainer somewhat more palatable.
The entertainment system features 5 old skool Linn speakers, the main left and right pair being a near mint set of Cherry finish Linn Ninkas. They're wasted in their current surroundings and deserve to be in someone's living or listening room. So I've been looking around for something less smart for sometime. A chance visit to a Linn forum member's house gave me some Ninka scale inspiration, in addition to some Katans I've seen pictures of, belonging to another forum member I know. So a plan was hatched to create something unique.
To paint a pair of Ninkas, it's easiest to start with Maple or Cherry finishes, as they don't have any physical grain like the other finishes. But it would seem wrong to paint the cherry speakers I have, they're just too good for that. Something else to consider is value - Cherry Ninkas sell for much higher prices than Maple. So the best starting point would be a slightly scruffy Maple pair. Finding stuff before it reaches the lottery of ebay is usually good, on the fee occasions it happens.
So the donor pair were secured, then the finish had to be decided. Furniture and kitchen refinishers in my area generally fall into one of, or both of these camps: they won't touch speakers or they only do a standard palette of colours. Fortunately I found a company that would take on the speakers and would paint from a sample. Given that the speakers I've been inspired by were both red, and that they would be occupying the same space as the red Summer toy, then the choice was made to match the car - in this case, Austin Rover Targa Red.
PREP
 |
| The starting point - rear of Maple Ninkas |
 |
| Starting point - front of Maple Ninkas |
 |
| Removing the drivers - all the bolts are the same size Torx fitting. I remove the tweeter first as its the most delicate |
 |
| The top mid-bass driver and tweeter removed - note the mid-bass driver magnet looks massive - largely due to the magnetic shielding - a reminder of the days of CRT televisions |
 |
| Each component was wrapped up for protection - here a mid-bass driver |
 |
| All the drivers out - time to dig down to the crossover |
 |
| Roll of fibre removed from behind the upper mid-bass driver - just to show the internal construction - there was no need to remove this upper roll |
 |
| One roll removed immediately behind the lower mid-bass driver, then another roll below that and you can see the crossover |
 |
| Looking directly down from the lower mid-bass driver into the base of the cabinet. Its not entirely obvious from this photo, but that bracing with the 4 round holes lies run front (top of picture) to back (bottom of the picture) about 300 mm up from the base of the cabinet. Also not obvious is that this bracing piece is at an angle to all four sides - presumably to help with reducing standing waves inside the cabinet. |
 |
| Working from the back of the cabinet, its necessary to remove all the collars from the connections. First, the white plastic blanking plugs are removed |
 |
| Choice of collar removing and refitting tools. The round handled one is the nicer to look at, the plain steel bar is much the stronger |
 |
| The removal tool slots into each side of the collar |
 |
| All the collars removed - under the collars are the 2 plates that allow easy reconfiguration between various passive and active connection options |
 |
| Both the connection plates removed. In the centre there is a single crossheaded screw that holds the crossover in place. This was removed to allow this area to be masked off for painting |
 |
| Here's the connector side of the crossover |
 |
| Once the crossover was released from the back panel, it was held in place inside the cabinet with a cable tie to stop it rattling around in the cab |
 |
| Whilst the speaker was on its back, time to take off the badge. The edge of the wood was protected by 2 layers of insulation tape |
 |
| Then a very thin flat blade screwdriver was used to lever the badge up. Really worth taking care here - some badges are extremely well stuck down and its easy to damage the badge or the wood. If its hard, best to put 2 layers of tape on all 4 edges of the badge and work around it gently. |
 |
| Badge removed |
 |
| Turned back over, the now connectionless connector panel is masked up. I didn't mask off the black model and serial number panel - I asked the paintshop to do that as it required some accuracy. As it happens, when the speakers came back, I could probably have done an equally not-quite-right job myself |

The 4 M5 allen bolts that hold on the (optional upgrade) polymer bases. These four bolts are removed to remove the bases. I took the M8 spikes out of the four corners first - its a bit safer that way.
 |
| After removing the polymer bases I added 4x M5 bolts and locknuts so that the speaker could still be stood on its base without damaging the cabinet finish |
 |
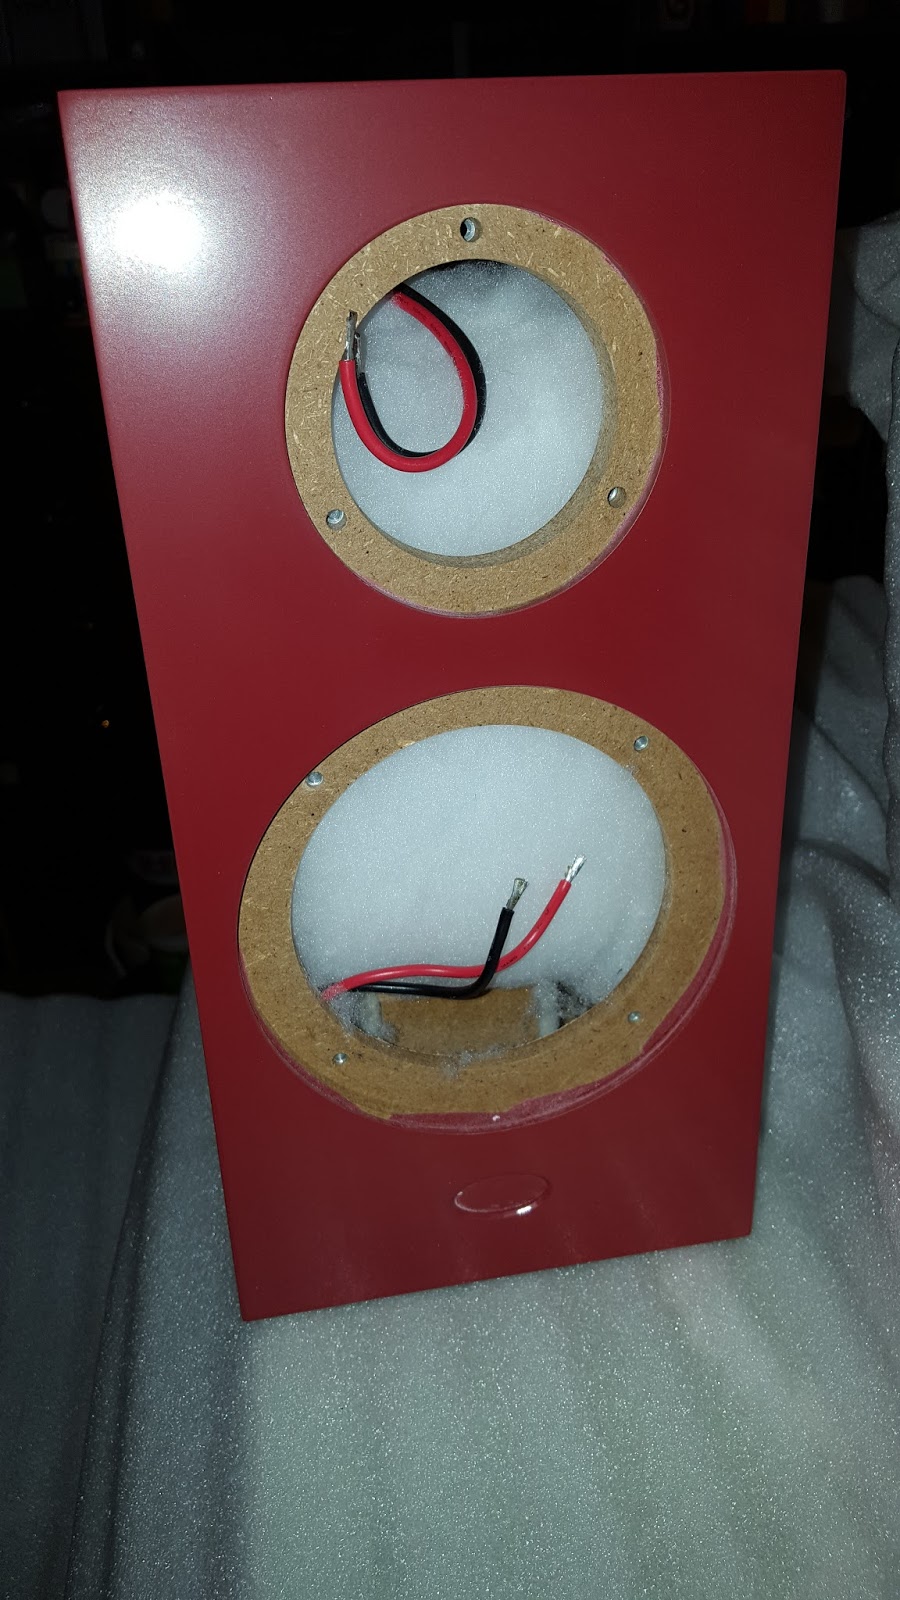
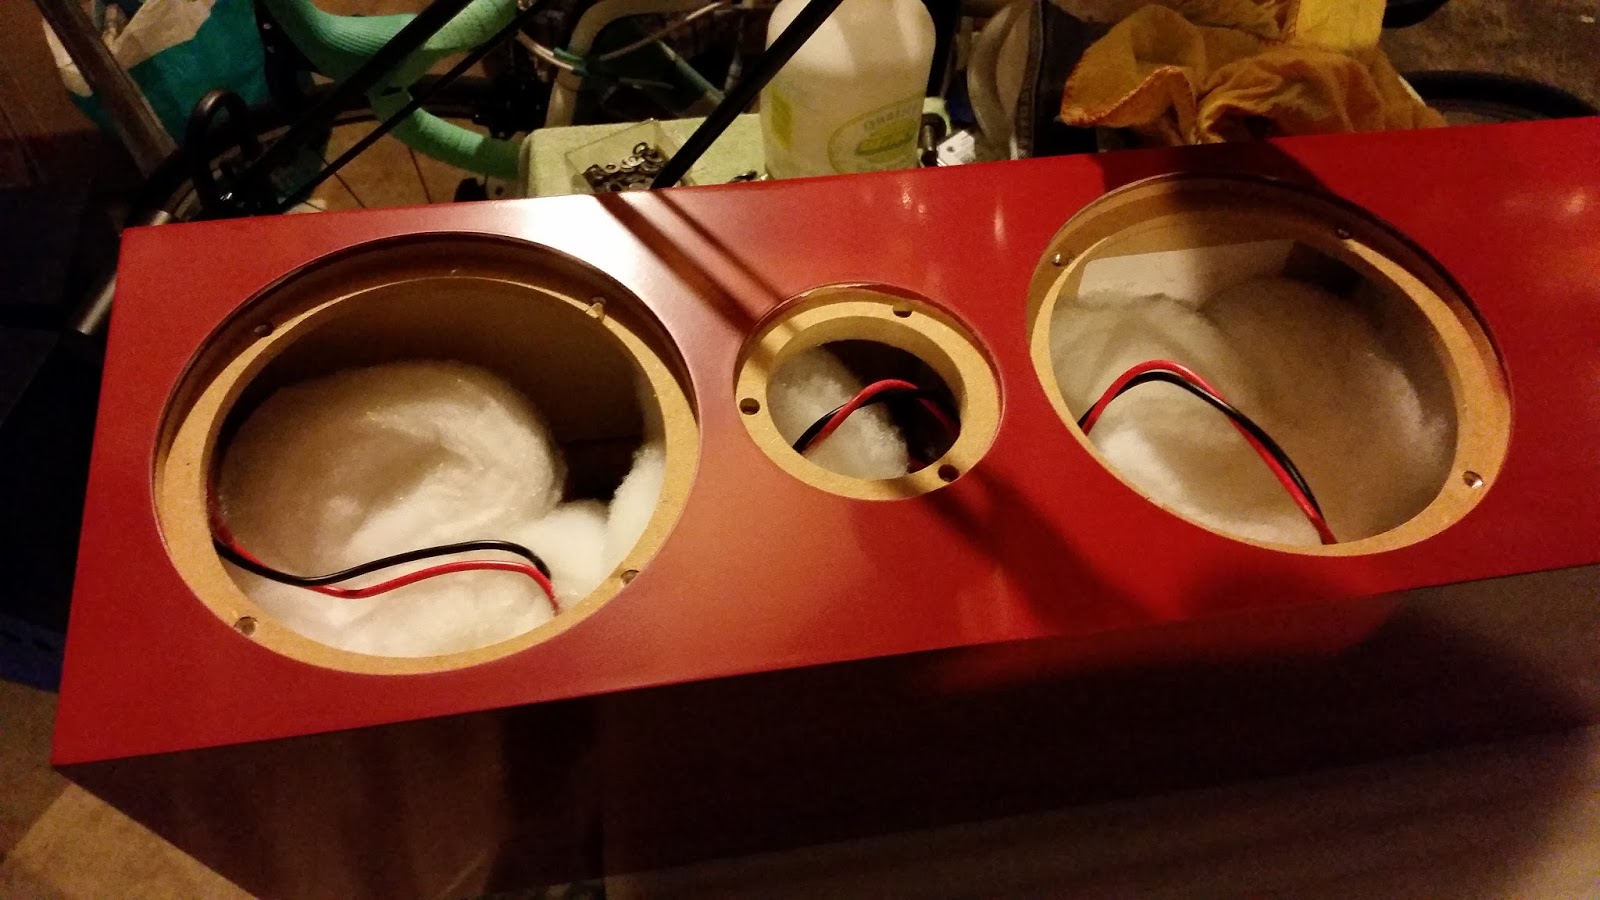
| Now with all the fibre re-inserted cardboard circles were cut to cover the driver holes. Masking tape hold them in place |
 |
| Before prep and after prep - time to work on speaker 2 |
 |
| Both cabs prepped |
 |
| Box full of carefully wrapped and padded bits |
 |
| Sample colour panel - provided by the auto bodyshop the last time the Sunbeam was in for body work |
Just after I'd finished prepping the Ninkas, at set of 5 Maple Katans popped up on ebay. It seems a set of 5 is not a popular number of speakers, meaning their cost per speaker was a good bit lower that it would be when just buying a pair. One pair went to a new home, the single speaker will be good for spares and the other pair joined the Ninkas in being prepped for painting. The Katans will replace a black pair I have which get used from time to time (for example, the
Scalford Hifi Show 2015).
 |
| Maple Katan ready for stripping |
 |
| Drivers out - their connections need to be unsoldered - I use a 40 watt iron. Unsoldering or soldering wires to the tweeter needs great care as its possible to melt the plastic around the connection tabs |
 |
| Inside view of the Katan crossover |
 |
| Inside view of the Katan's rear port - before existing the port the soundwaves have to get through the felt on each side of this box and then through 90 degrees into the port itsself (just visible as a black tube below the box) |
 |
| Katan connection panel with plastic blanking plugs and all collars removed |
 |
| Both connection panels removed - the connectors and crossover are held in place by a single screw, just like the Ninkas |
 |
| Katan crossover removed from the back panel |
 |
| Connection side of the Katan crossover |
 |
| Crossover removed |
 |
| Badge removed and cardboard masking discs in place |
 |
| Masked connection panel |
 |
| I don't know where this particular Katan has spent its life - perhaps on its back on the top of a cabinet or something? Its only dust, lots of it, so cleaned off very easily with a very lightly dampened cloth |
REBUILD
6 weeks of waiting later...the boxes were back. The finish is OK, but rather dull - I was expecting a deep lustre to the finish. I suppose the very reasonable price I paid to have them painted didn't include the labour to make them shiny! Using Zymol - a high quality car cleaner polish - each Katan took a good 2 hours of polishing to get them looking good - 4 times around each cabinet. Boring, but effective. Of course, the Ninkas took around 3 hours each.
 |
| Upwrapped - the finish direct from the furniture refinishers |
 |
| Here, its easy to see the dullness of the finish, and a little "orange peel" effect. |
 |
| Here its clear that the label had been masked - but its not perfect |
 |
| Crossover, connection panels, collars and plastic blanking plugs refitted |
 |
| Refitting drive units - a cloth covers the new paintwork whilst the cables are resoldered. I did the mid-bass first to avoid damaging a re-installed tweeter. |
 |
| Drivers reinstalled (this is the one shown covered in dust in the prep pictures above), just before refitting the rubber trim ring around the mid-bass driver |
 |
| The first of the Ninkas to be rebuilt |
 |
| Before polishing |
 |
| Car polish |
 |
| Re-installing a Ninka tweeter |
 |
| Refitting the 4x M5 mounting bolts for the polymer stands. To allow for moving the speakers around safely, M7 allen bolts are fitted to the spike mounts at this point. The masking tape on the top side of the polymer stands prevented the car polish having any effect on their finish |
RESULTS
 |
| Looking good in the workshop |
 |
| With the inspiration for the colour |
 |
| Its fair to say that the finish looks better in the photos than it is in the flesh - although you have to get up really close to see the occasional pitting and orange peel effect. I think the quality of the job reflects the reasonable cost of the work |
 |
| Now with a decent shine |
 |
| I don't have a set of the correct stands yet - here they're sitting on Atacama SE24s - the right height, but the top plate is too big |
 |
| The flash is distorting the colour here - if you look down near the floor, that's more realistic representation of the true colour and the closeness of the colour match to the car |
 |
| A better idea of the real colour in natural light |
 |
| Pretty pleased with the final result |


 The 4 M5 allen bolts that hold on the (optional upgrade) polymer bases. These four bolts are removed to remove the bases. I took the M8 spikes out of the four corners first - its a bit safer that way.


Lovely job cheers Kiwilinn
ReplyDeleteThank you Kiwilinn
ReplyDeleteHi, I am attempting to replace a tweeter in a Linn Ninka. Do you happen to remember what Torx key size was required to remove the tweeter flange? Thank you.
ReplyDeleteThey're T20
Deletewhat a nice job. I feel inspired!
ReplyDeletehow do you remove the front protection on the Ninkas?
Thank you for the kind comment.
DeleteUsing the corner of a credit card, push it into the gap between the metal mesh grille and the rubber ring then gently lift enough to get your fingers into the gap. Then you can peel the ring away - be ready to catch the grille.
While you're there, don't go too hard, but make sure all the driver mounting bolts are nicely tight. When replacing the ring you need to align the indentations over the bolt heads and then feed the ridge around the outside of the ring into the groove in the cabinet.