I like them.
But bolted onto their bottoms, supporting them above their resting surface are 4 large diameter feet. They're also very nicely made machined solid lumps of metal, but, disappointingly for me they're chromed, and therefore rather "blingy". This might not be too bad a thing for those who have the silver version, but mine are the black version, chosen to be more discrete and not so much of a distraction when listening to music.
So, with these been Linn's top of the range kit, there'll be a choice of feet for those who don't want highly polished chrome gleaming out from under their kit? Nope, not even the black version of the kit has the option of more subtle feet.
So what to do about it? Well an early experiment used the insides of toilet rolls coloured black with a marker pen - just to see if they would look better. They do, indeed, look much better, to me at least. As the feet are quite far back on the underside of the unit, when the feet are black it gives the impression of the kit "floating" above the shelf. Quite pleasing, and no distracting glinting.
So the search was on to find something more permanent than the loo roll inners, but that would not be permanent to allow for return to standard, should that be required later. Its taken over a year to get around to something better, the addition of KK/1 and KCT/D into the system this year meant either doing more loo rolls or putting that time into something better. At the factory visit in September 2015, Linn forum member Steven someone suggested heatshrink (thanks for that, a great idea to try) and that was so blindingly obvious really, don't know why that wasn't thought of before.
So here is the step by step description of what I've done - keeping it all reversible of course:
Materials:
- 200mm or so of 80mm diameter black heatshrink - no writing printed on it, no adhesive inside
- Evo stick glue (optional)
- insulating tape
Tools:
- small screwdriver
- allen key
- sharp craft knife
- cutting board
- try square
- steel rule
- heat gun (or hairdryer)
NOTE: only do this if you are completely confident. Do not do this if you have any doubts. If you decide to do this, it is entirely at your own risk and no liability will be accepted for any mistakes in the instructions or in your actions. Take great care with the tools and the heat gun. Take great care with the finish on your unit - its easily damaged. Thanks! :-)
First, disconnect your Klimax unit from everything. Clear a flat area - make sure it is very clean, then cover with a thick soft material such as a clean towel. Lay the Klimax kit upside down on the clean material.
 |
| Klimax shiny chrome feet, as standard |
Place a small piece of insulating tape on the edge of the foot (to protect the finish), then use the screw driver to lever up the rubber foot pad, pivoting on the protected edge of the foot - it lifts easily. Once started, it can be peeled back using fingers. Remove the insulating tape.
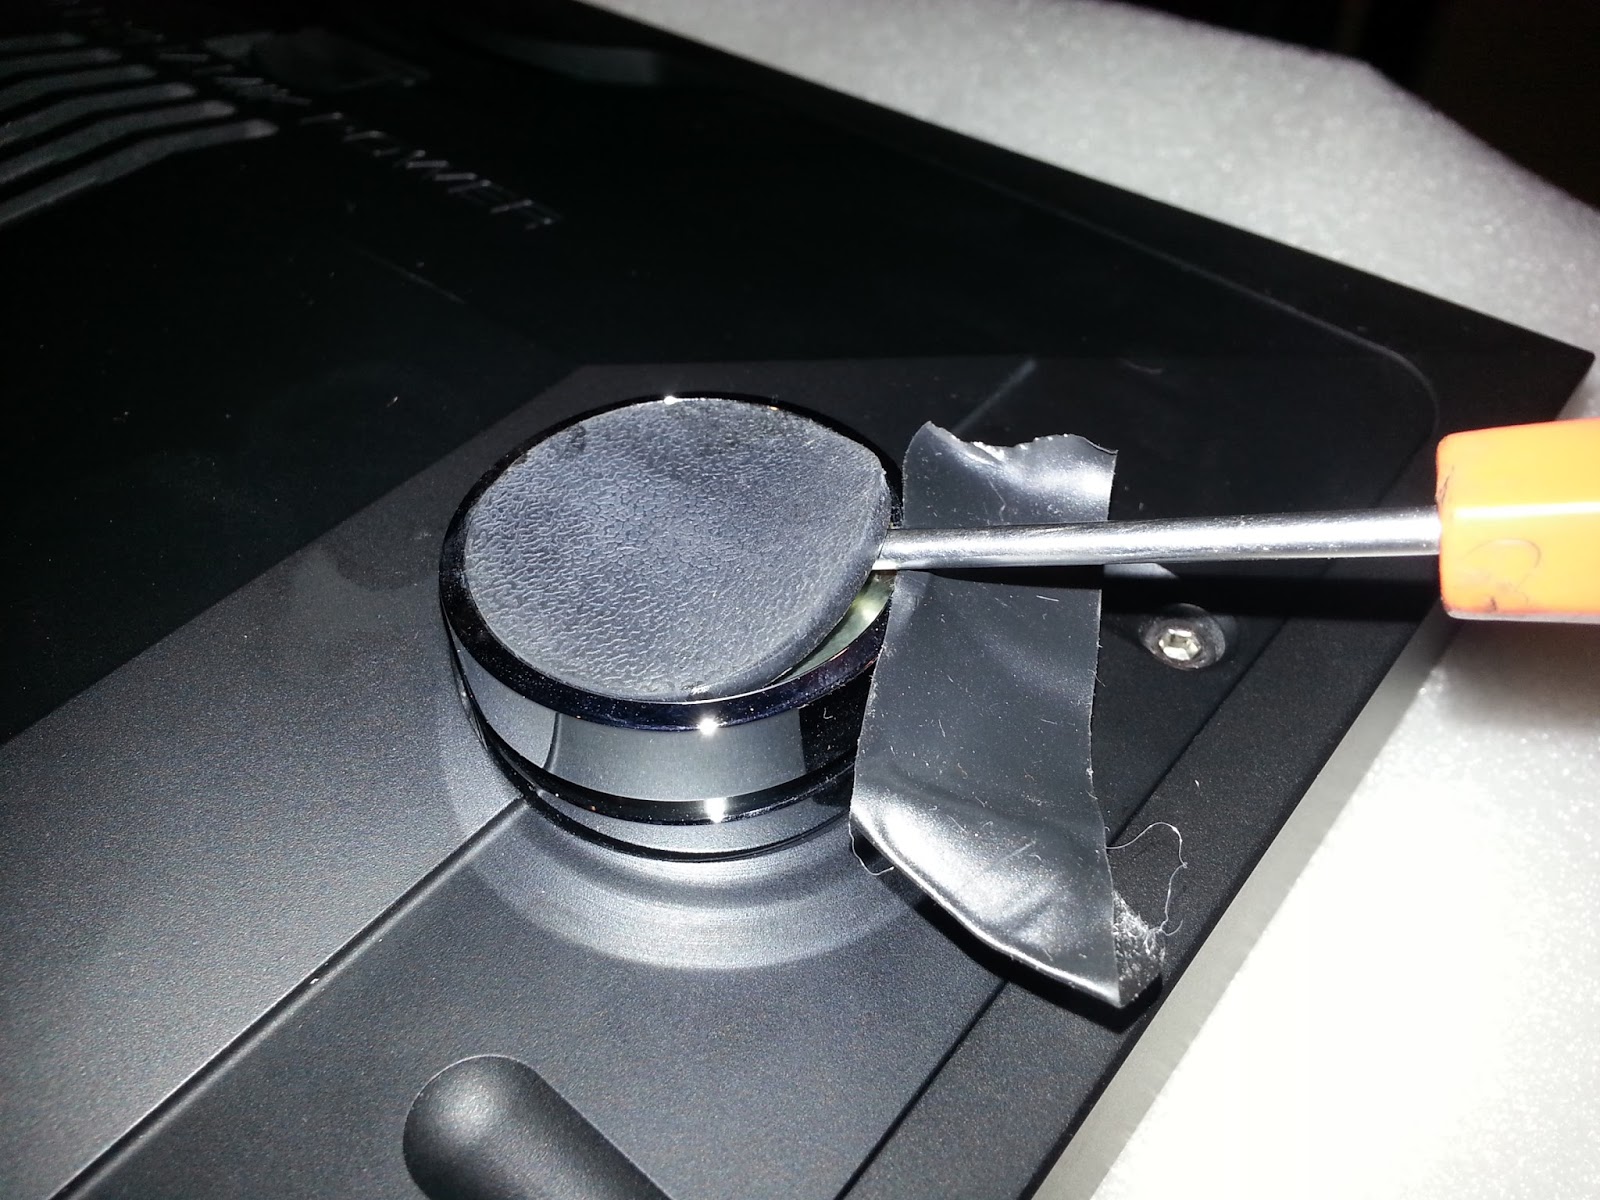 |
| Levering up the rubber pad - insulating tape protects the finish of the foot |
 |
| Removed rubber disc |
The rubber pad is held in place by a very thin film of double sided tape. Using the sharp knife, cut away a disc in the centre to allow the removal of the mounting bolt.
 |
| Double sided film cut away to allow access to the bolt |
 |
| Under the foot is the threaded mount and a step in the inner side of the cut-out |
 |
| The removed foot, from the top - there is a step in the foot to match the step in the unit casing |
 |
| Removed foot on the 80mm strip of heatshrink |
Using the steel rule, measure a length of heatshrink - 17.5mm is ideal if you can be that accurate, but 18mm is fine too. 17mm isn't enough as it doesn't cover the full depth of the foot. Now, using the try square again, with it and the heatshrink aligned with the edge of the cutting board, use the sharp knife to cut across the heatshrink. You will end up with an 17.5mm or 18mm tall hoop of heatshrink.
 |
| Aligning the cutting board edge, try square and long edge of the heatshrink ready for cutting |
Place the foot on a heat proof surface, with the double sided tape facing down onto the surface (to protect it from the heat). Drop the loop of heatshrink over the top of the foot, so it rests on the heat proof surface. Now gently heat using the low setting on the heat gun (or a medium / high setting on a hairdryer), moving around the foot evenly, from about 10cm away. Heat for a few seconds then make sure the heatshrink is still touching the heat proof surface, then repeat several times all around the foot until the heatshrink is fully in touch with the foot, all the way around. Do not keep heating as it will get too tight and start to shrink vertically, which is not helpful. Most times you will get a nice smooth surface, but sometimes the heatshrink will have some slight indentations. If it does this, you can choose to do it again, or not, up to you.
You will note that the heatshrink shrinks into the cut-out section of the foot - this is the part most likely to lift up from the surface, if you heat the material for too long.
 |
| Heatshrink fitted |
 |
| "Tabs" cut into the heatshrink where there is a cut out in the foot |
 |
| Trim the tabs away with the sharp knife |
 |
| Completed foot back in place |
 |
| Klimax Twin amp with standard feet in the foreground and stealth feet in the background |
 |
| Stealth feet on the Klimax Twin (and some dust) |
 |
| DS |
 |
| DS |
 |
| DS and KK |
 |
| DS and KK "floating" |